Showing posts with label paper creations. Show all posts

Tuesday, 25 September 2012

Tear, Sew, Paint

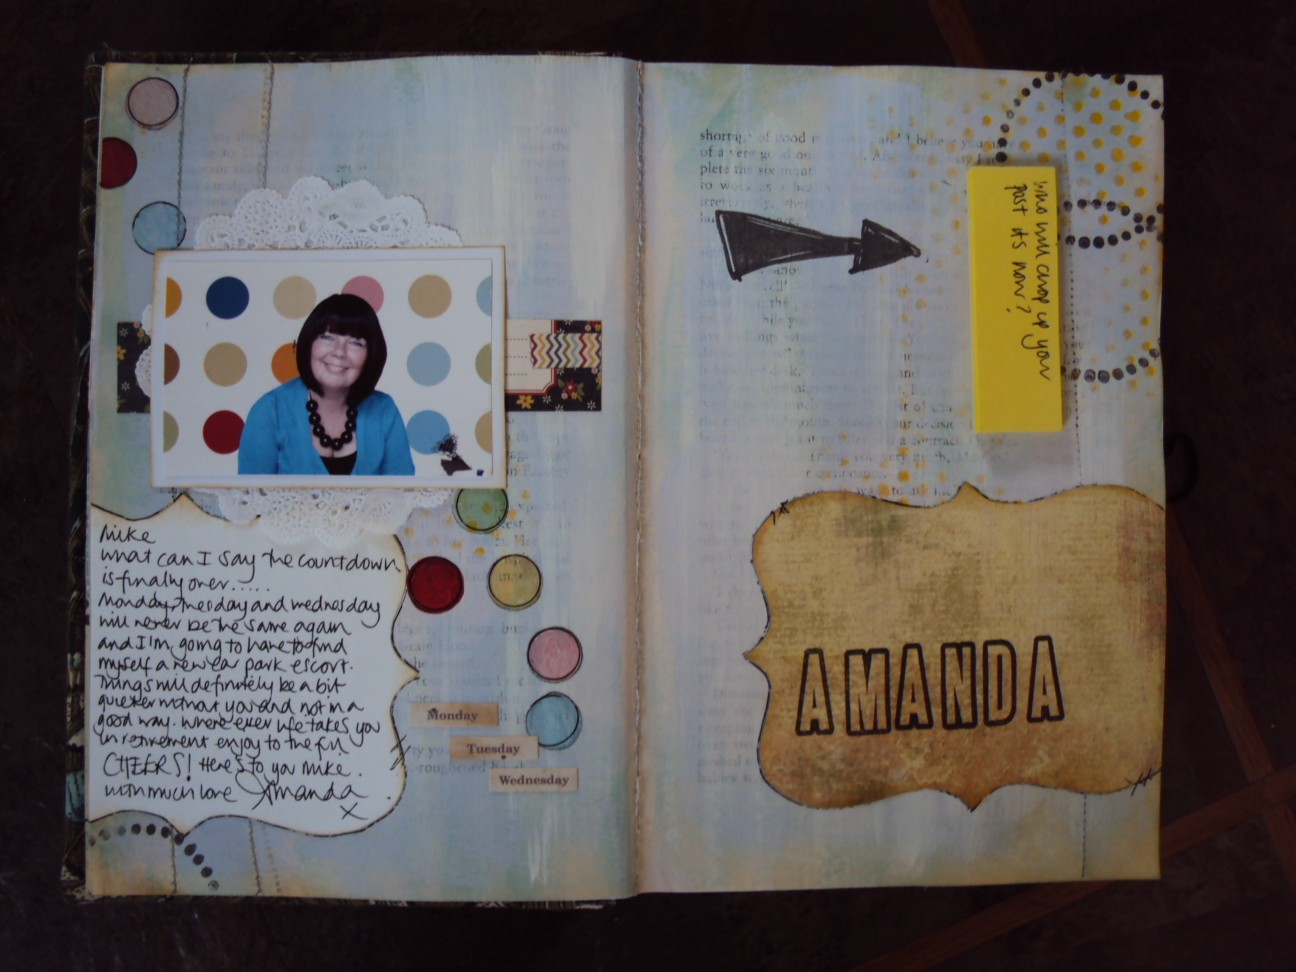
Recently a colleague of mine retired and I wanted to make him a keepsake that could hold photos and messages that he could remember people by. An altered book seemed an ideal choice so after much tearing (I hate that bit!) I made 'pages' by sewing about 5 book pages together. This makes them sturdy enough to take paint although it's still best not to make them too wet.
Here is my page, a tentative start, ideas seemed to develop more as I went on. I tried to build up layers with masks and stamps with of course a bit of doodling.
...an emergency elastic band. He's very keen on flicking elastic bands, you have to keep your wits about you. Between us all we managed to include many shared jokes and humorous moments.
I was lucky enough to find an old postcard of a local building which was part of a project he worked on. I was also lucky to find a treasure of a book page in a Plundered Pages pack that I had from Julie used for another keepsake. It referred to the exact area and raised a few smiles.

To finish I stitched a fabric cover. It featured a photo that I had printed onto photo canvas which I was able to then stitch into the design with a button closure to keep everything safe.

All in all I think everyone who contributed enjoyed adding their comments and I think my colleague was touched to receive it and I know he loved it which makes it all worthwhile.


Thursday, 17 May 2012

Home Sweet Home - mark 2

Hi when I've not been busy with granny squares I've been dabbling with frames again. This one is bigger than the last one I found but I gave it the white treatment again.
No bunting this time but the flowers stuck......

.....those felt flowers, would you like to know how I make them? They are good for 3D projects and of course if you make your own  embellishments you get to choose what colour they are.
First cut five flowers shapes, I use my ever useful tattered floral die but if you don't have a flower die, circles would work just as well.
Take one of the flower shapes and fold it in half and half again so it's a quarter of it's original size. Hold it's shape with a couple of stitches at the pointed end.
Taking one the shapes as the base of your flower sew the quartered flower to the centre of the base with a couple of stitches. Repeat folding the other three shapes and sew them in position too covering the whole base shape.
Once you've finished you should have a fluffy looking flower. The felt gives it a very rounded shape and two back to back would give a pom-pom effect. (mmmmm now I'm thinking they would make lovely tree decorations.....don't get distracted!) If you make them from fabric they have a less structured look but are still as effective. It's fun to experiment with different flower shapes too.

Have fun creating.


Sunday, 22 April 2012

Home Sweet Home

I have a bit of recycling to share today. This oval frame was a rather ugly shade of brown when I spotted it but I thought it had potential. The moulding was pretty and it looks so much better with it's new white look.

I used a couple of paper flowers that I bought last week at Alexandra Palace and added a couple made using my tattered floral die with felt and fabric. Taking the glass out meant I could string the banner across the frame and I love the blue of this Studio Calico paper set against the white.

Keep your eyes peeled for old frames that might not look very nice as they are but look a whole lot better once given a spray painted finish. It's also a good solution if you want to give a unifom look to a collection of mismatched frames and I think white frames give a modern look.

Let me know if you give a new lease of life to an unloved frame.

Tuesday, 17 April 2012

A Few New Supplies....

Time today to showcase a few of my purchases from The Big Stamp and Scrapbooking Show. Did you go?
I deliberated for ages over this die made by Memory Box called Catalina Wreath. It looked so delicate and I can see that I will get lots of use from it. It looks pretty good just simply cut from plain white cardstock.
I mounted it on some foam pads and added the sentiment with Kaisercraft Tiny Alpha Stickers. Why haven't I seen these before, I'm officially in love. There are always plenty of suppliers of pretty gems and I wasn't disappointed at MeiFlower where I found lovely satin ribbon too.
Whilst doilies aren't a new idea I snapped up a pack of small ones including this heart. At the centre I used just a few of the huge pack of sequins that Glen gave me, I thought they added an interesting bit of texture......and sparkle.

And I seem to have gone a little scissor crazy and bought a scissor stamp and enough scissor charms to keep me going for, well - a long time. If when I make something with them I'll be sure to let you know.

Monday, 23 January 2012

A New Pillowcase = A Fabric Album

I recently bought some new pillowcases and when I unpacked them out fell some cardboard packaging from inside. It looked just like the cover of an album. So I remembered not to leave it out so it was safe from the recycling bin.

Then an idea began to form of how I could put to good use some of my new found quilting techniques and make a fabric cover.
I pieced together some of my favourite scraps and included a tiny crocheted doily that I found along with some decorative scissors and buttons.

The rear view

Rather than using machine quilting I handstitched all the panels and added some ribbon and felt flower details.
Inside I attached a strip of card reinforced with some washi tape with holes punched where I could thread the book rings through. It was a bit tricky but I got there eventually. The cardboard 'album' simply slips into the pockets on either side.
I'm going to use this album to record my sewing projects completed in 2012.

I realise now I should have shown you how the album started life but I did buy a new sheet at the same time so there could be an album number 2.

Wednesday, 16 November 2011

The Holly and The .........

Hi. Today I thought I'd share some very simple and quick instructions to make some holly leaves. Now I know some of you are not thinking about Christmas just yet it's just that I am trying to get organised and have many projects in the making. To be honest you could use the instructions to make any sort of leaf you like.

So you will need.....
A leaf template to draw around (or you can go freestyle), some strong thin double sided tape, some glue, book pages or any type of paper you fancy using and some thin floristry wire.
For each leaf you will need to cut out two identical shapes. Secure a bit of tape down the centre of the leaf shape and fix your wire on top. Glue the second leaf on top with the wire sandwiched in the middle.

You can then ink them, add glitter, doodle around the edges or whatever takes your fancy. You could even make them out of felt or fabric. They would be great for Christmas journals or layouts, Christmas cards and 3D projects.

In my stash I found some small flat back red pearls perfect for berries and as they are wired you shape them however you want. So now I have some holly ready to go.

Wednesday, 14 September 2011

Like Pebbles on a Beach

Hi. Sorry I haven't been around for a while I do have a proper excuse so bear with me while I catch up and get back to blogging business. Last week I had a knee operation and progress has been good but I haven't been able to do much blog visiting and commenting so I apologise I'm not ignoring you.

Anyhow, excuses out of the way I wanted to share a little project I squeezed in just before my operation. The weekend was warm and sunny so we took a visit to Deal where we ate the best fish and chips on the sea front. While looking out to sea I was dreaming up a project as unlike where I live Deal has a shingle beach not sand..........mmmmmmm pebbles.
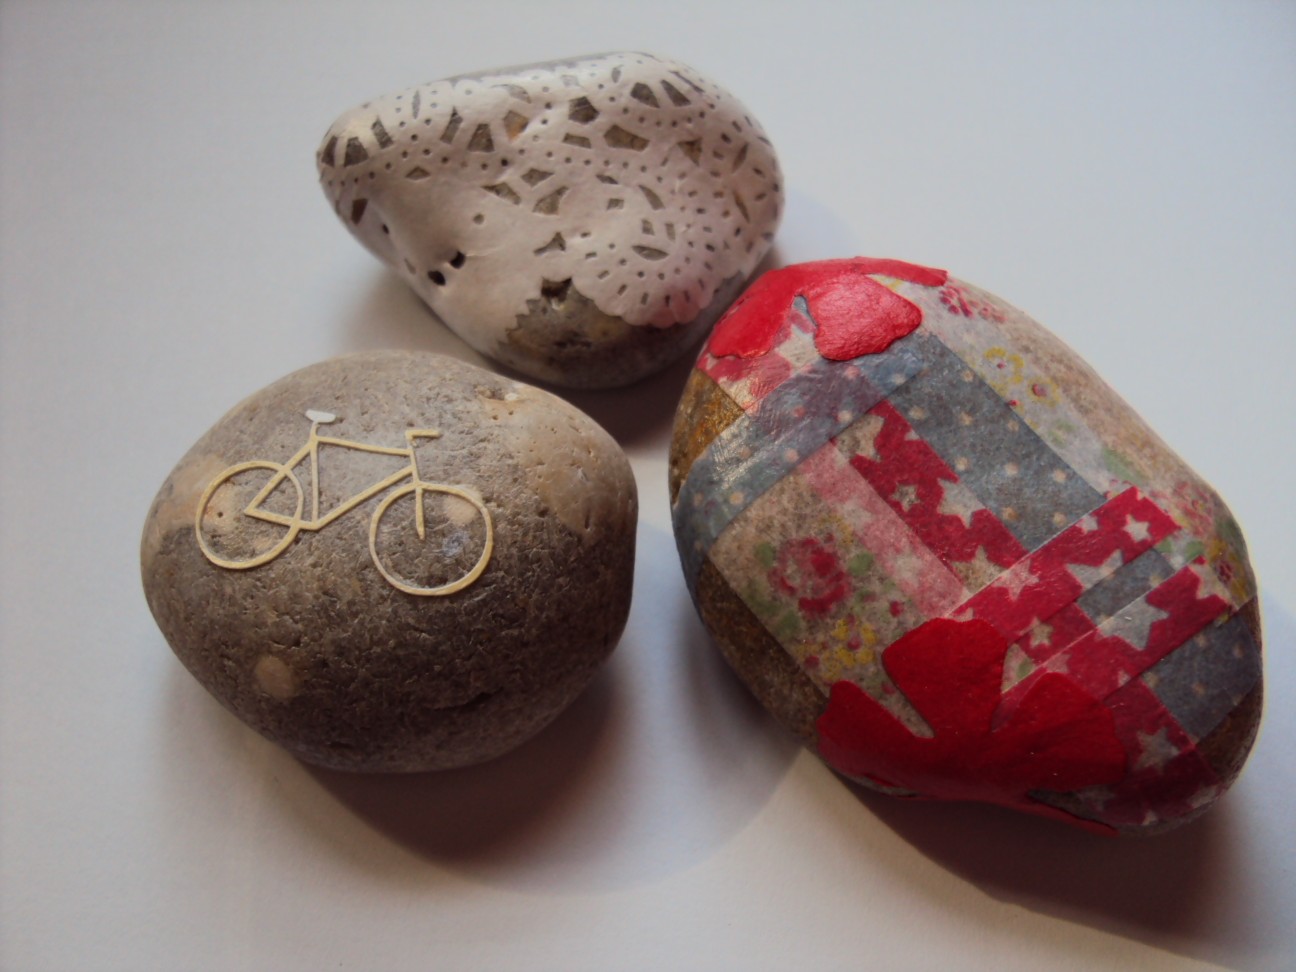
I was humoured while I set about collecting some pebbles and even got some help with some brought for my inspection, were they the right shape, colour, size? So in return I made him a paperweight, the one decorated with the bicycle. Can you believe the Silhouette cut that! You might recognise the CK tape and yep, the tattered floral die cuts too. The other one has a bit of simple paper doily - my favourite I think. All were finished with a good coat of mod podge to protect them.

And I promised to show you a view of the messy half of my craft room, I'm ashamed to say it still looks like this but I just concentrate on the tidy bit.
.....and don't think I've forgotten the high hat too it's on my long list of things to do.

Bye for now

Wednesday, 15 June 2011

Place Card Ideas

This week I've been asked to make some place cards for a ruby wedding anniversay celebration. I wanted to try and make something a bit different to a traditional place card.
So I gathered some supplies........

Red tissue paper, a die cut butterfly, some circle stickers, thin florist wire, cake decorating flower stamens, a red promarker and ribbon.

And this is what I came up with.
I'm loving paper flowers and I thought it would be a good way to include a bit of 'ruby' colour. This is version one I may tweak a few things what do you think?

Tuesday, 10 May 2011

Get Knitted

So, I finally scrapped - hurray. I'd been wanting to scrap this photo for a while and I thought it would look good with my texture tuesday photo from last week. The colour scheme of pink and orange is a bit unusual and not something I would probably have chosen. The papers came in a bargain kit I picked up from.........yes you've guessed it, TK Maxx for £2.00. It also gave me a good opportunity to use some orange glittery alphas that at some point I obviously thought it was a good idea to buy. Why? I can't decide whether my layout looks bright and summery or just plain gaudy but at least it sees a return to scrapping and that can't be bad.

If you're wondering about the photo it's me aged 17, knitting while sitting under a hairdryer getting ready for a night out - like you do! And yes my hair was red and blonde I was obviously struggling against it's natural state of straight and brown to make it blonde and curly.

And please don't say I didn't warn you but my new addiction is making napkin flowers.
Now perched on my kitchen window sill.....

.............And through the round window.

The male of the household is hoping that I move on to a new addiction some time soon.

Sunday, 6 February 2011

Create

Hi. Have you had a creative weekend. Mine started on Friday when I spent the day chatting and eating cake with some friends with a bit of creating thrown in. I downloaded some cute birdhouses for the Silhouette which we decorated in our way. With the addition of a door I can see these making great little beach huts.
In fact my friends were so impressed with the Silhouette they had to buy their own so in between the eating cake, chatting and creating we had a shopping excursion too. I hope you like it girls. Looking at the Silhouette blog I was interested to see that there are some new lines being introduced and fabric interfacing is one of them. I think there are going to be some tutorials coming up on how to cut fabric so I'll be keeping an eye on that.

For my February Monthly Make I thought I'd do a bit of papercrafting and a bit more getting to know my Silhouette.
I cut out one of the pennant shapes that comes with the studio software and used some of my neglected material girl paper to decorate. 
I can see real potential in these with all kinds of uses............I just need to make a note of them so I don't forget.

The little dog you can see keeping watch is by Total Pap. I should really take some photos of the windows they have done locally as they are amazing and much nicer to look at than an empty shop window and there are a lot of empty shops!

Happy creating.
 

Monday, 22 November 2010

More buttons, more gnomes and a winner

Hi.

The gnome production is chugging along in preparation for (I'll whisper it) *Christmas*. I saw a sign the other day saying 'only 36 shopping days until Christmas'. Well that was enough to send me into a panic. Here is the teeny tomte, he measures just 9 inches from his boots to the tip of his outstretched hat.

I've also made some more Christmassy buttons, yep there's no stopping me now I'm on a roll.
The ones in the middle have tiny holly leaves stamped and coloured on them.

I was very excited last week to receive the Moo minicards cards I ordered. I uploaded images of journal pages and cards I've made. You might even spot the paper dahlia wall decoration I made. I was pleased with how they turned out and should anyone actually buy anything from me they will be going into the packages that I send. They make great labels too.
And before I forget completely the winner of my button giveaway is Kirsti Your chosen Cath Kidston buttons will soon be on their way to you and I'll pop one of my button flowers in too, you can use them on layouts or cards or even to decorate a gift.
Bye for now - Happy crafting

Sunday, 24 October 2010

Scrapping of Sorts

After an enforced lack of blogging due to no internet connection I'm happy now to be back in full working order. Tip: reconsider if you currently have Norton security it does it's job so well that it blocks connecting to the internet. It appears I'm not the only person to have suffered in this way. 

Ok serious bit over onto the scrapping.........all but in miniature

A much loved colleague is retiring this week and the office is going to be a whole lot quieter without him. He is someone who has supported my crafty endeavours and I know that he will appreciate something created for him.

He has been finishing jobs and clearing paperwork and when I spied him recycling his business cards I knew that I should retrieve them. After a bit of ferreting about in the recycling bin I found them and kept them safe but not quite knowing what to do with them.......That was until I saw a brilliant tutorial by Kirsty Neale on how to make a minibook from business cards. I've altered it a bit to fit in with how I wanted it to end up as I still wanted the business cards visible in places.
Then I had a tricky moment when the ribbon left to fasten around the cover wasn't quite long enough to tie properly. What to do? My non crafty husband came to the rescue with the suggestion of 'why don't you use some velcro?' Genius, I had some sticky velcro dots just waiting for such an occasion. You know, one of those 'they will come in handy purchases for some future project if only I can remember where I put them!'.
So there we have it a minibook made from business cards with it's very own box........

Monday, 12 July 2010

Me a wallflower?

A very good friend of mine sent me a link to a brilliant tutorial for making a felt dahlia corsage. Now, whilst the instructions were very clear and I could see how lovely the end result could be I'm ashamed to say I abandoned my attempt. Yes, I baled out early. The tutorial did say that the stage I got to was the most frustrating - how right it was. This is my attempt, I'd even bought special fabric glue but it just didn't want to stick and drying took forever. I'm not the most patient........Perhaps one day I'll revisit this little project but just as likely it will get lost in the blackhole that is my craft room. Then around the same time I saw these fabulous fabric wall sculptures and decided to recreate one in paper on a somewhat smaller scale using the same technique as the felt dahlia.

This is my prototype it measures about 12" in diameter and is made from 12x12 double sided scrapbook paper. At first I thought about mounting one on a square canvas but then remembered that you can buy self adhesive rings for hanging posters and I think one of these would work well to mount directly onto the wall. If I make another I think I might try to add another layer of petals or make a beaded centre but I'll definitely use a more striking colour combination.

You never know where inspiration is going to come from do you?